This post may contain affiliate links. If you choose to make a purchase through these links, I earn a small commission at no cost to you. I do not promote anything I do not believe in or stand behind.
Winter is here! Where we live, the temperatures are very cold and we hope for lots of snow to fall over the months of December, January and February. Some days, it is just too cold, wet and snowy to go outside. That’s when I like to bring out a fun indoor activity to do with my toddler and preschooler.
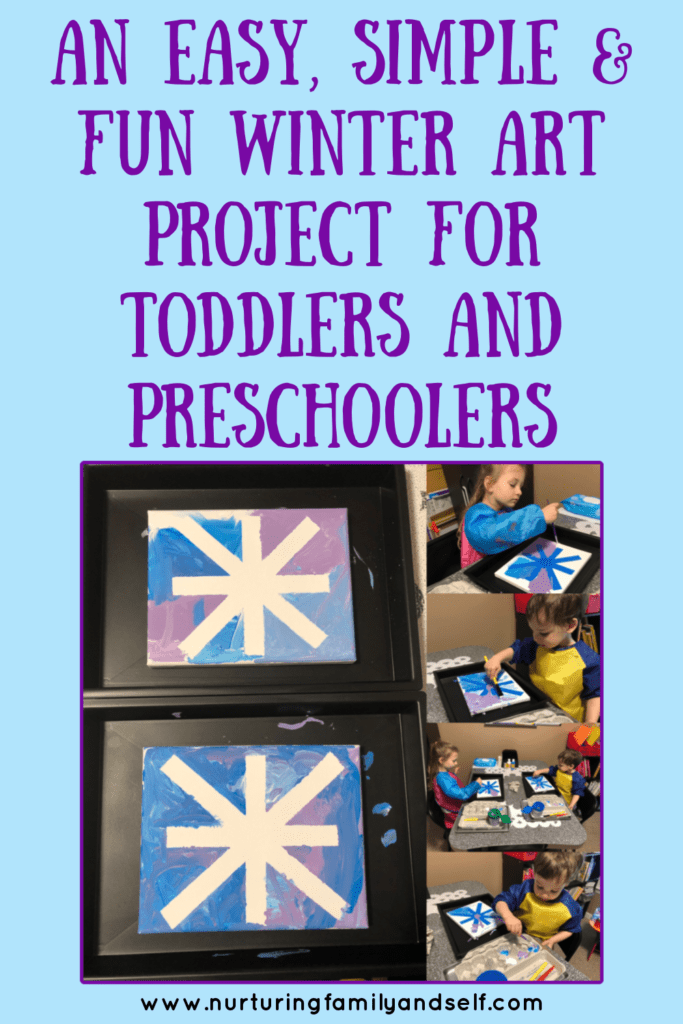
A winter-themed snowflake tape resist painting is the perfect indoor activity for a cold wintry day. This snowflake tape resist painting is easy to set up and fun for kids of all ages. I always enjoy when one activity can be used with both of my kids!
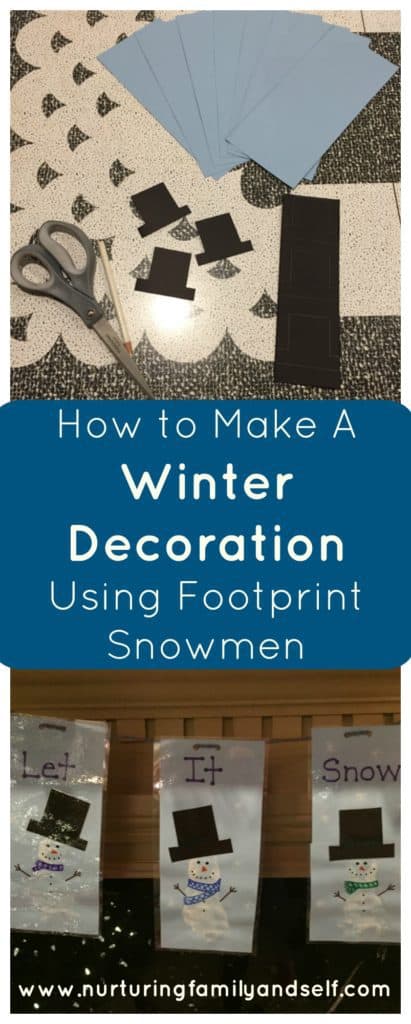
The finished snowflake painting makes the perfect winter decoration in our home, too! They pair really well with our footprint snowmen garland. Seasonal decorating is my jam and if I can find a way to involve my kids in the process, I am all about it! Plus, my kids love to see their finished projects on display throughout the house!
What do you need for snowflake tape resist art?
- White Canvas – You can find these at the Dollar Store. Thicker paper, like white cardstock, is another option for this project.
- Washable Paints – I chose to use the colors blue, purple and white because these colors remind me of winter.
- Assorted Paint Brushes
- Painting Tray – I’ve found that an egg carton, muffin tin, ice cube tray or paper plate work well for painting trays.
- Plastic Water Cups – This is for washing the paint brushes out in between colors. We love using these spill proof paint cups for water.
- Wet Washcloth – I keep this nearby to wipe up any spilled paint. This was a tip shared by Susie from Busy Toddler.
- Blue Painter’s Tape
- Baby Wipes – I ALWAYS have these nearby when doing a painting project with my young children. I can quickly wipe off hands before the paint ends up on other surfaces.
- Painting Smocks – An old shirt works just as well, but we love these colorful and durable art smocks. They are easy to wipe off and my preschooler enjoys putting her paintbrushes in the pockets!
How do you make the snowflake tape resist painting?
Now that you have all of your supplies gathered, it’s time to start painting!
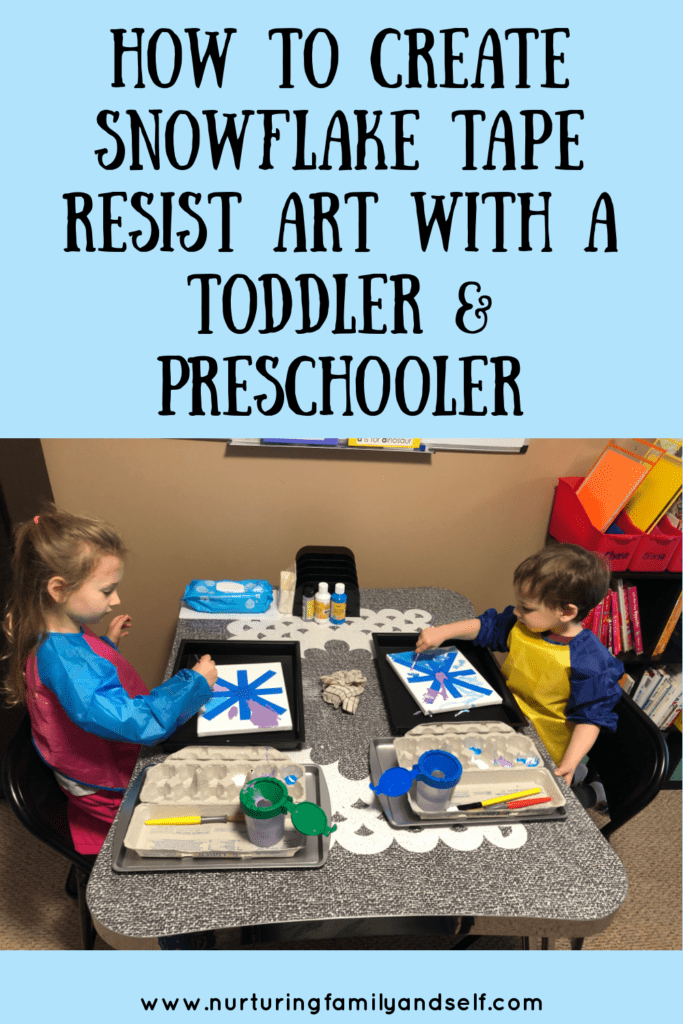
First, you need to take the blue painter’s tape and create the snowflake shape. I used a total of 4 pieces. I created an asterisk shape by doing a plus sign followed by two diagonal lines crossing in the middle.
Next, prepare the painting surface by putting down newspaper, a plastic tablecloth or brown paper bag opened up. You can also lay pieces of brown craft paper to cover the surface for painting. When the kids are done painting on the canvases, give them an opportunity to do some free painting on the brown craft paper. My preschooler loves to free paint after we do a more structured painting project. I figure there is always some paint leftover so I might as well let her enjoy the process a little longer.
Then, put some of each color paint into a section on the painting tray. I used an egg carton. I put one color in one section. The empty sections are great for giving your child the freedom to mix the white with blue and purple to make different shades. The winter colors of blue, purple and white work really well together! Fill the painting cups with water and lay out the paintbrushes. Invite your children to start painting.
While your children are painting, encourage them to cover all the white space around the tape with paint. Make sure they go right up to the edge of the painter’s tape. This helps to really define the snowflake shape when you peel the painter’s tape away. When my 3 year old started, he just wanted to paint on the tape. I kept telling him to paint on the white space because we would be peeling the tape off once the paint dries. Eventually he listened!
It’s so fun watching my toddler and preschooler paint. My daughter was very intentional about the colors she chose to put on her canvas. She would tell me which colors she was mixing and where she was putting them. My son enjoyed mixing all the colors and just putting the paint everywhere. I showed him how to take the thick globs of paint and pull them around so it wouldn’t take as long to dry.
Once my kids were finished, I let the canvases dry. It actually didn’t take that long and I was able to peel the tape off later that day. My kids loved seeing their finished project and enjoyed peeling the tape off. Peeling the tape off is a great fine motor activity! I attached a picture hanging command strip on the back and hung them on the wall in our front entryway. Each year, when I decorate our home for winter, I will enjoy pulling these out and hanging them up.
So that’s how you create snowflake tape resist art with your toddler and preschooler. This painting project is a fun indoor activity for a cold winter day. Painting encourages creativity and teaches young children about colors. As they mix the white with the blue and purple, they are experimenting and noticing how the more white they add, the lighter the color becomes. Plus, it’s fun! I haven’t met a toddler or preschooler who doesn’t love to paint. And I bet your toddler and/or preschooler would enjoy creating this snowflake tape resist art project, too!